How To Add Extra Planets To Celestia
Planets on Celestia – 2012 VP113
Celestia is a free open-platform astronomy program. We have been receiving questions about how to add extra planets (models) to Celestia. We listen to what our website visitors ask us, so here’s a detailed tutorial of how to add planets, comets, asteroids, etc., to Celestia. The following tutorial works for objects in our own Solar System. [The guide for adding objects to other star systems is similar and we will post it later at our visitors’ request.]
Note: For everything you do on the PC or device, you need to have administrator rights; it needs to be your own computer or you need to have permission from the computer owner to make changes to the PC. This guide is written for computers running Windows, but the process is almost the same for Apple computers.
Software – Programs You Need
Software that needs to be installed on your PC or laptop:
Celestia (free astronomy program, click to download from Celestia’s website)
Microsoft Word [or any other word processor that opens .docx files]
WordPad [or any other program to open Rich Text Format (.rtf) texts]
Tutorial
Step 1
This is tutorial for Windows, but you can try it on your Mac or Linux.
Download and open the file containing the code.
Here is the link to the document, it is a link to GoogleDrive.
As plain text here:
Here’s a link to Google Drive here as well.
Right click save as [save link as], click download this file or just open it and copy the code.
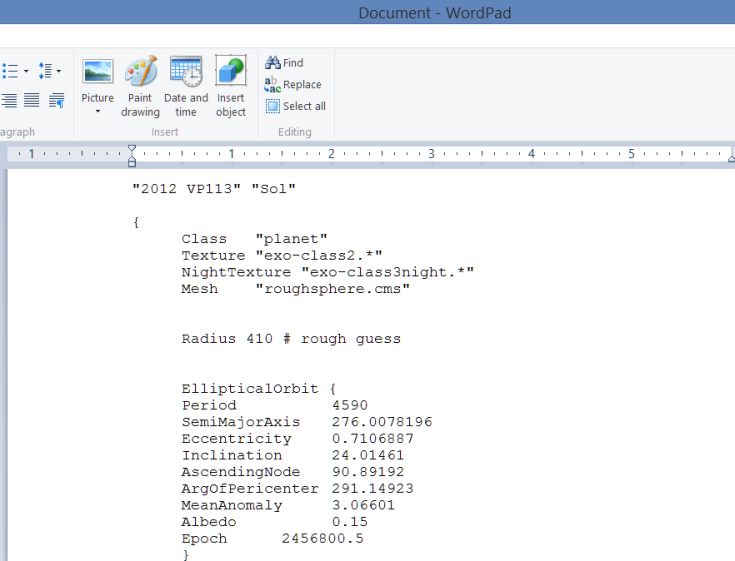
Copy the code from the Word document and paste it to WordPad.
You can also copy the code [below] from your web browser. Then paste it on WordPad.
“2012 VP113” “Sol”
{
Class “dwarfplanet”
Texture “eros.jpg”
Color [ 0.65 0.45 0.35 ]
Radius 410 # estimation
EllipticalOrbit {
Period 4590
SemiMajorAxis 276.0078196
Eccentricity 0.7106887
Inclination 24.01461
AscendingNode 90.89192
ArgOfPericenter 291.14923
MeanAnomaly 3.06601
Albedo 0.15
Epoch 2456800.5
}
#Info Url redastronomy.com}
Code by Rediscovered Astronomy with information from the Minor Planet Center
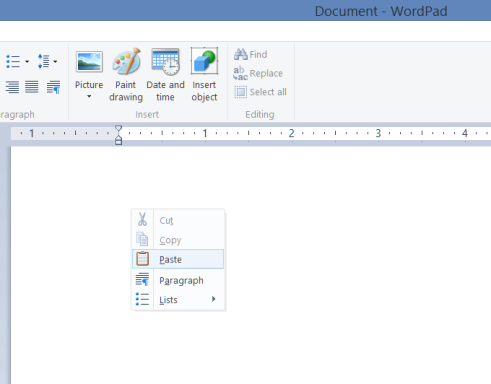
You must paste the code directly to WordPad or to the program you use to open Rich Text Format (.rtf) texts.
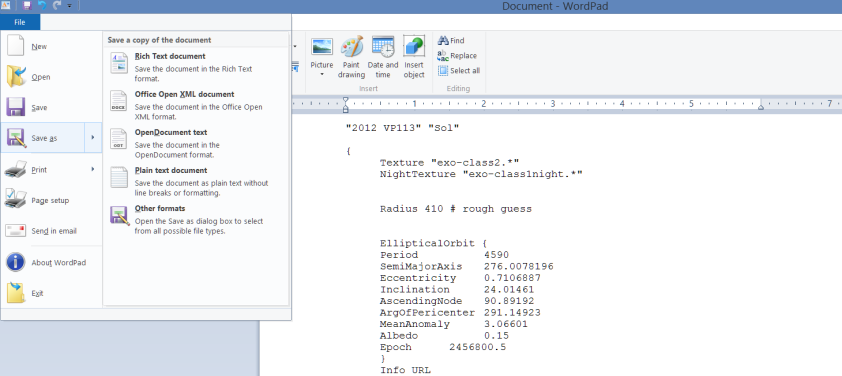
Step 2
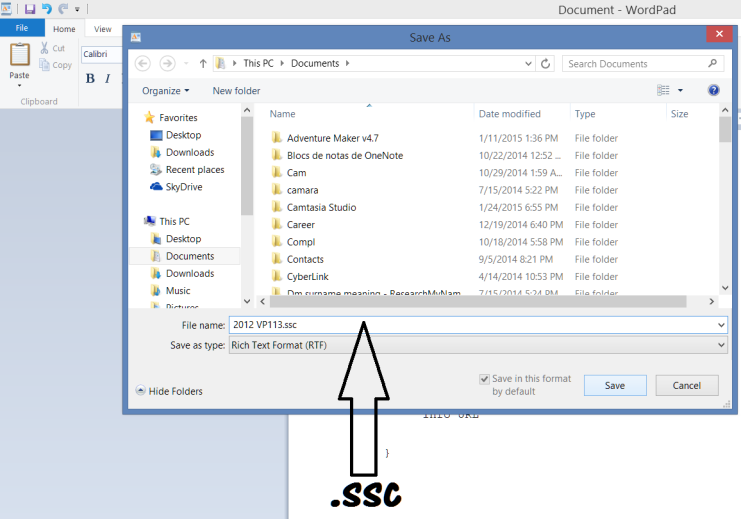
Click File Save As on WordPad.
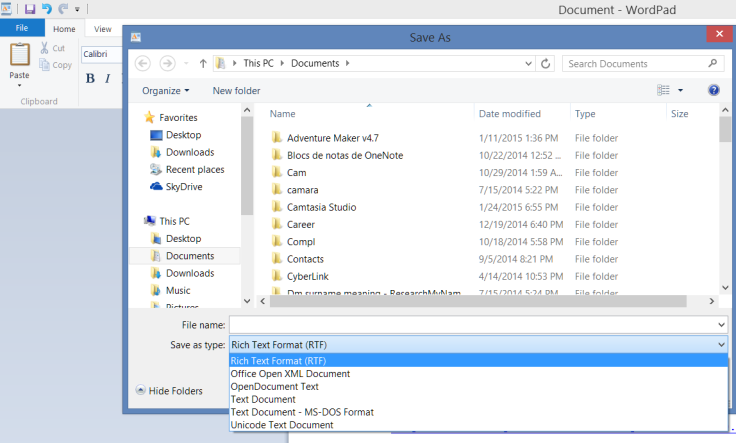
Step 3
Save as type: Make sure you choose Rich Text Format (RTF) from the drop down menu.
Step 4
File name: Save the file with the name 2012 VP113.ssc – The file extension again must be .ssc, otherwise Celestia won’t load the add-on planet / object.
Step 5
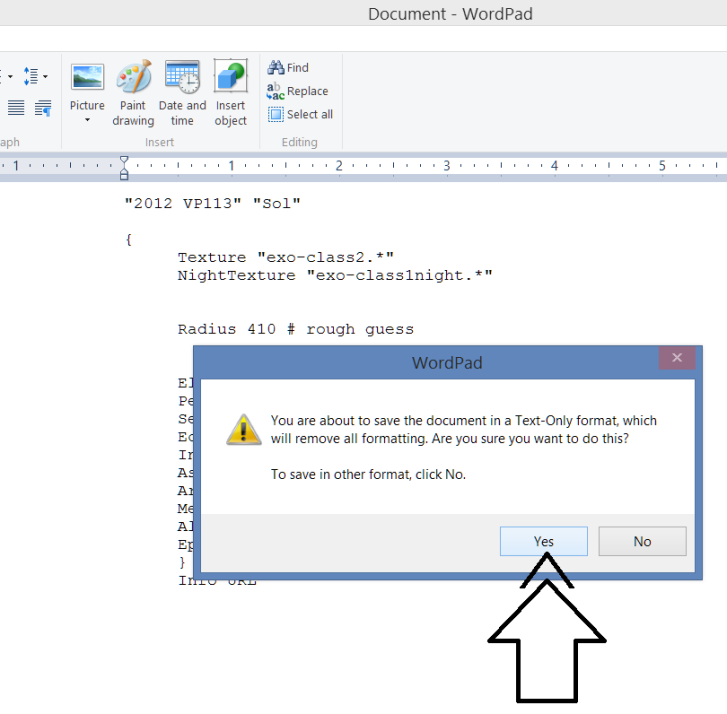
Text-Only format: You may get the message … remove all formatting … click yes.
Step 6
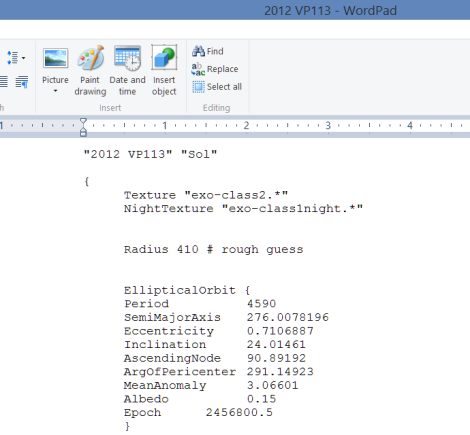
Celestia File: Your Celestia model / file should be ready to add to Celestia. Exit WordPad [click file exit].
Go to your file explorer and find the folder where you saved your file [2012 VP113.ssc from step 4]. Right click copy.
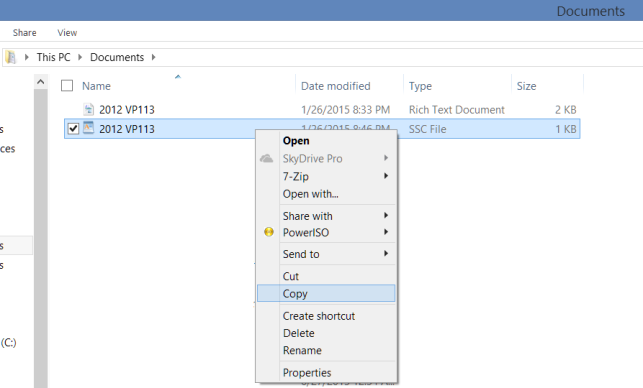
Find your Celestia – Extras folder. Here is where all Celestia add-ons should be pasted. Celestia is usually located within the Program Files (x86) folder [or Program Files]. This is the default path, C:\Program Files (x86)\Celestia\extras
Right click and paste the file named 2012 VP113.ssc to the extras folder.
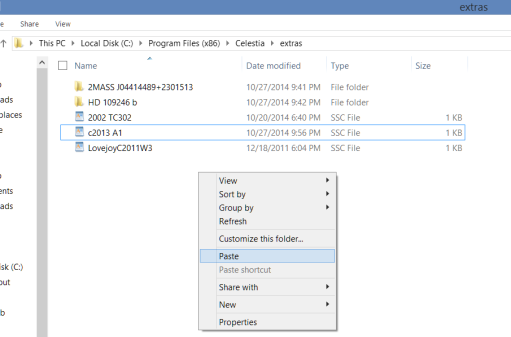
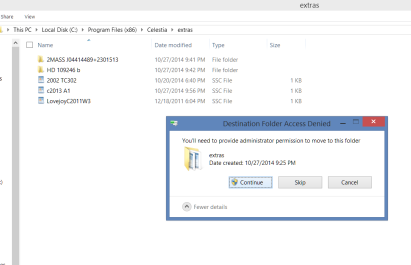
As noted before, make sure you are using the PC / laptop as administrator. Click continue.
Look that your file was copied correctly to the extras folder and with the .ssc extension [type].
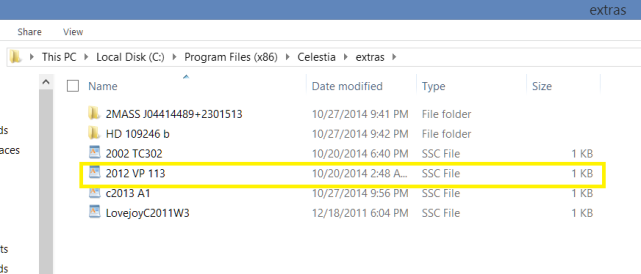
That’s it!
Celestia will load the add-on you’ve just created the next time you run the program.
Here’s how it should look.
Open Celestia
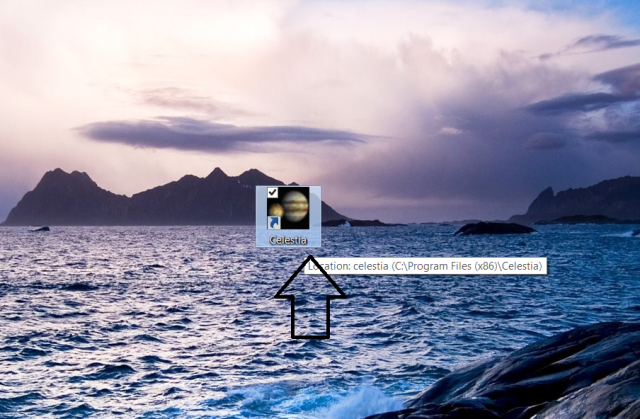
Wait for Celestia to load then hit enter on your keyboard.
The dialogue box Target name opens,

Type in the name of the object 2012 VP113 and hit enter again.
The top left screen of Celestia should display the model name 2012 VP113.
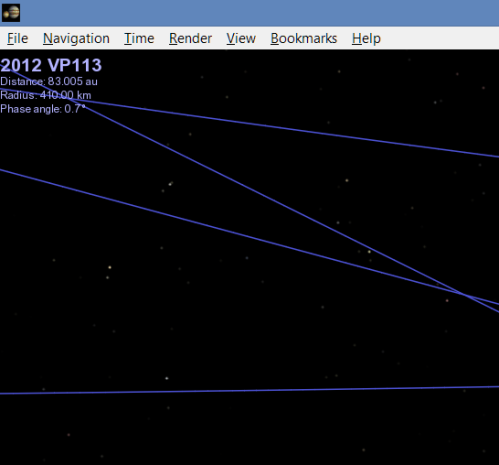
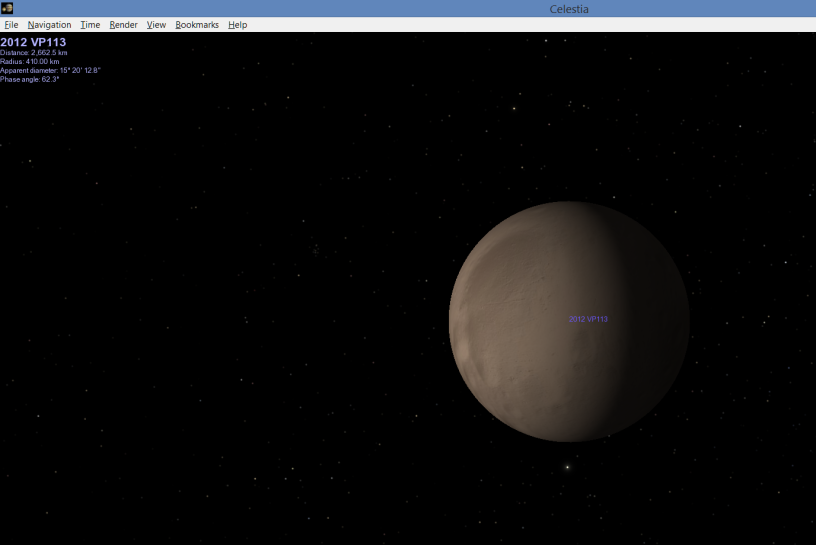
Press G on your keyboard for Celestia to go to your destination, 2012 VP113.
You should be there!
Written by J.J. Del Mar
Celestia is a free open-platform astronomy program.
You can download Celestia here.
Don’t forget to visit the add-ons website as well Celestia Motherlode.
Word and WordPad are trademarks [software] of Miscrosoft Corporation.
Subscribe to our YouTube channel.


